It’s very convenient to place an icon on your desktop so you can click and go directly to a Zoom meeting. This will save you the time and hassle of looking up your regular Zoom meeting addresses.
This set of directions was created on a Windows 10 workstation. There may be some variation with other versions of Windows.
Here are the necessary steps
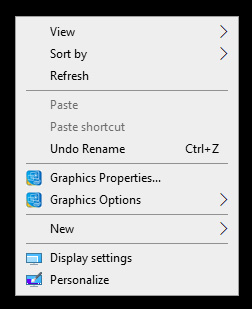
Right click on a blank space on your desktop and you should see this:
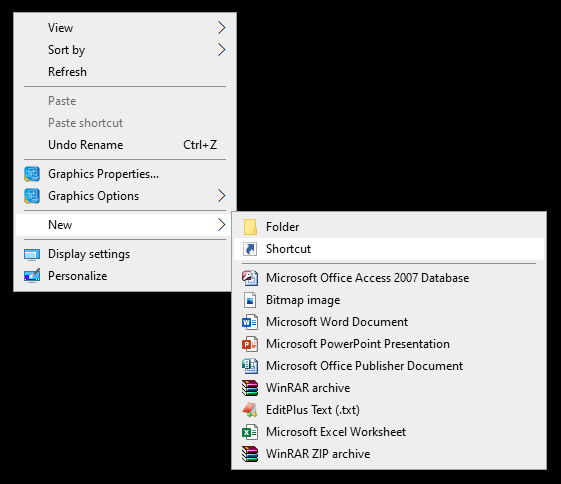
Now mouse over New and click on Shortcut:
Then you should see this Create Shortcut dialogue box:
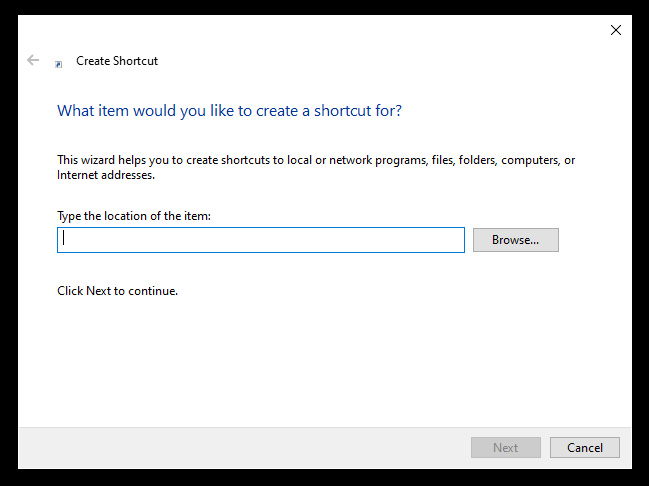
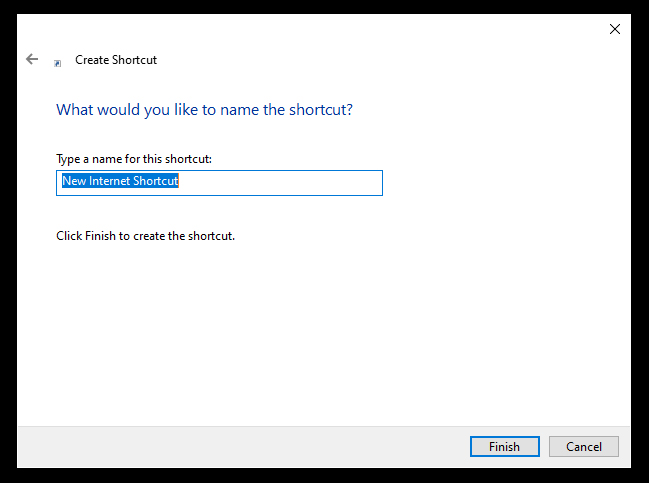
Now just paste the Internet address of your Zoom meeting and click the Next button. Then you’ll see this next dialogue box. Here, you can customize what to name it, like My Office Zoom Meeting or My BNI Zoom or any meaningful label you desire. Once you’ve named it, just click the Finish button:
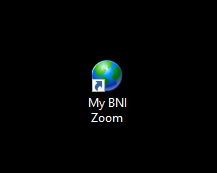
There! You’ve created a working desktop Internet shortcut that will open up your default browser (like Firefox or Chrome or Edge) and take you directly to the Zoom meeting. It might look something like this (if you chose to name it My BNI Zoom like I did):
Changing the Icon
Now to get really fancy, we can change the icon that your new Internet shortcut uses to the Zoom icon. Here is how you do that:
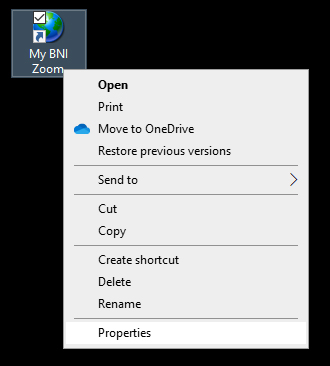
Right click on your new Zoom shortcut and click on Properties. You should see something like this:
Mouse over and click on Properties. Then you should see something like this:
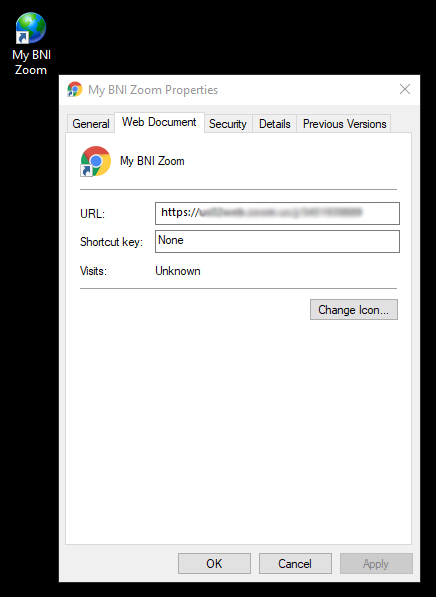
The Properties dialogue box URL should show the URL you chose earlier. To change the icon the shortcut uses, click on the Change Icon button. You should see something like this:
The Change Icon dialogue box is where you choose the Zoom icon for your shortcut.
On a usual install on a Windows 7 or above workstation, you can simply copy and paste this over what’s already in the address area
%APPDATA%\Zoom\bin\Zoom.exe
If that worked, then you’re done!
If the above didn’t work then at this point you will need to browse to where Zoom.exe application is on your computer’s hard drive. Go ahead and click on Browse.
Note: Here is where you will most likely be navigating to, and the steps following this indicate a click by click (or directory by directory) navigation path to Zoom.exe:
C:\Users\[your user]\AppData\Roaming\Zoom\bin\Zoom.exe
Here are the individual steps:
- Now click on System internal drive (C:) (this is usually the correct drive in most cases) in the address bar in your window.
- Then click on the Users folder in the window.
- Now you will need to click on whichever user YOU are on the computer. The user is indicated when you initially log into Windows. If you don’t know for sure, you can try clicking on the Windows icon in the bottom left corner of your screen and seeing if it is indicated there beneath a space under START and above items like Documents, Picture, Settings, and Power.
- Now click on the AppData folder.
- Then click on the Roaming folder.
- Now click on the Zoom folder.
- Now click on the bin folder.
- Now click on Zoom.exe and click on OK.
Now click on the Apply button and you’ll save the new icon path.
You can now click on OK to exit the Properties box. Now you’re done! Make sure to test out your new desktop icon to ensure it works properly.
Duplicating the Zoom shortcut
You may need to have two or more Zoom shortcuts. Luckily, duplicating shortcuts is a lot easier than creating a new one. Here’s all you have to do.
Right click on your new Zoom shortcut and click on Properties. You should see something like this:
Just mouse over the word Copy and click on it. Now a copy of the shortcut is in your copy buffer.
Position your mouse to a blank spot on your desktop where you’d like to place the new shortcut. Right click and you should see something like this:
Just go ahead and mouse over the Paste option and click on it. The shortcut will be copied there. Note that it already has the Zoom icon!
Now go ahead and right click on the new shortcut to see this Properties dialogue box again:
Now either copy and paste (recommended if its a long complicated URL) or type in the correct URL for your next Zoom shortcut. When done click Apply and then OK.
The last step is to rename the new shortcut appropriately. Just right click on it again to see your choices once again:
Now just click on Rename and finish up the process!