Replacing the batteries in most APC Back-UPS systems is usually a relatively simple task.
A UPS (Uninterruptible Power Supply) system is an extremely important part of one’s computer system. It provides power should the power grid supplying your home or office drop below or rise above a certain level.
Consistent power protects your computer system and your data. It protects your computer system by regulating the voltage to your computer, monitor and any other components plugged into it from variances in voltage that can damage electronic devices. It protects your data by preventing unexpected computer shutdowns. Unexpectedly removing power from an operating computer system can cause loss of data and hard drive corruption. We can’t stress enough that the UPS system is an extremely important part of good computer system operation. Every computer system – no matter how large or small – should have protection from power failures.
This is just a test line
Hosting companies (like here at CharlesWorks) have UPS systems on all of our servers. This keeps our servers operational during power failures for the 11 seconds it takes for the backup generators to automatically power up and take over for the power grid.
In this post we hope to show you how easy it is to open the BR1000G APC Back-UPS Pro 1000 and replace it’s batteries. Although we’ve used the BR1000G unit in this example, the batteries in most UPS systems can be replaced and the idea of replacing many of them is very similar.
Replacing the APC Back-UPS batteries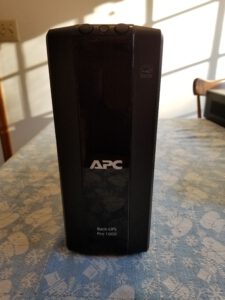 While we’ve seen batteries last as long as eight years, most just don’t last more than three to five years. APC recommends that batteries be replaced every three years. We recommend that you place a post-it or similar marking on the outside of the unit somewhere to indicate either when you purchased the UPS system or the date that you replaced the batteries. This will facilitate keeping track of when replacement should be done. |
Removing the battery pack from the UPS unit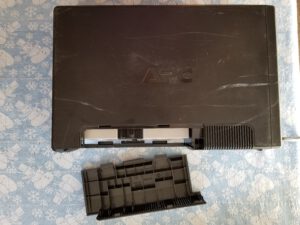 The first step in the task of battery replacement is to remove the battery compartment cover. We suggest laying the unit on its side as shown here. This allows the battery compartment cover’s tabs to be pressed in so the cover can be pulled up. Once the cover is removed you will be able to see the two batteries. Note the plastic piece in between them: that’s a connection assembly mentioned above. You can gently lift the top of the unit which should allow the batteries to slide down/out of the battery compartment. Sometimes the battery does not simply slide out. It may appear stuck. In that case most likely the batteries are damaged. We’ve seen many cases where the batteries expanded and even cracked open inside the battery compartment. This can make them extremely difficult to remove. Placing the unit upright with the batteries facing downward and gently tapping the unit on your bench may help in removing them. They WILL come out. |
Disassembling the battery pack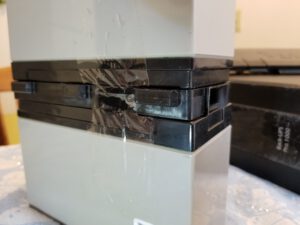 The APC Back-UPS Pro 1000 unit operates on 24 volts DC. It uses two 12 volt batteries wired in series to make a 24 volt battery pack. The batteries are connected together in the battery compartment using a plastic electrical connection housing unit. The batteries sandwich the connection unit. The connection unit has an electrical connector on one end that connects to a matching electrical connector on the frame of the UPS unit inside the battery compartment. New units will be held together with adhesive backed tape-like material whereas previously replaced batteries may appear more like seen to the left here. That plug is wired to the cables on the electrical connection housing. The housing also has a single cable with battery connector plugs on each end of it. That cable connects the two 12 volt batteries in series to allow 24 volts to be supplied to the APC Back-UPS Pro 1000 unit. |
Separating the batteries from the power connection unit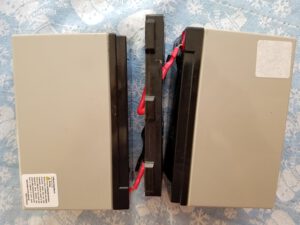 The batteries and the plug housing are held together by tape or some other material designed to make a battery pack as mentioned above. This needs to be removed from all sides. Once the material holding them together is removed from the batteries, you can start the process of separating the batteries from the plug housing. Here are the two batteries on their side showing how they are connected to the electrical connection housing in between them. You can start to unplug the first battery from the electrical power connection now. Which one you choose first is of no consequence. |
Removing the batteries from the battery connectors Now you can disconnect the second battery from the power connection housing. We’ve found it easiest to stand the battery up as shown to the left to remove the connections. |
Battery connection unit with serial wire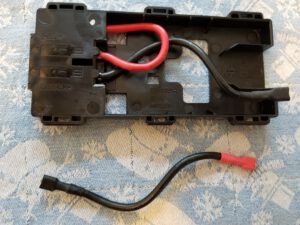 This is just a photo showing the pieces of the battery pack’s electrical connection unit after being separated totally from the batteries. The wire shown by itself with the black and red connectors on each end here is an important component of the battery connection unit. Do not lose it. It is the connection that provides the APC Back-UPS Pro 1000 unit’s 24 volts DC by using two 12 volt batteries wired in series. Sometimes it will fall away from the connection unit but is easily put back into place. Remember to put it in place providing a black (negative) and red (positive) battery terminal hookup on each end of the unit (there should not be two black connections and two red connections at each end). Without that connection, the unit will fail to operate. |
Battery connection unit ready for new batteries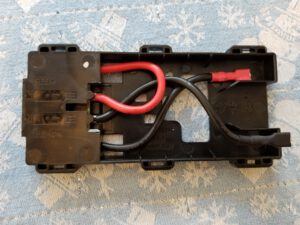 Here is a bottom view of the battery connection unit with the serial connection wire properly in place. As indicated earlier, the APC Back-UPS Pro 1000 unit operates on 24 volts DC. This electrical connection unit is what allows two batteries to be used to supply that voltage. We will add two 12 volt batteries wired in series to this electrical connector housing to attain the 24 volts needed for proper UPS operation. |
Bottom view of the battery connection unit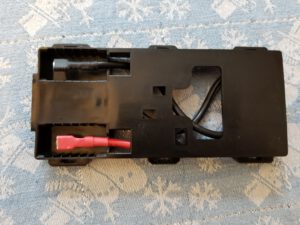 Now that we have the battery connection unit separated from the old batteries we can connect the new batteries to it. The two connections shown to the left need to be connected onto one of your new batteries. . |
Hooking up the battery connector unit to the first new batterySetting the battery on your work bench and attaching the connectors from the battery connection unit is one way of connecting the electrical housing to the first battery. |
Hooking up the battery connector unit to the second batteryJust as when we took this apart, we need to connect both of the replacement 12 volt batteries wired in series to attain the needed 24 volts. Setting the batteries on their sides while hooking up the second battery may be the easiest way to perform this. |
Use packing tape to create a battery pack from the batteries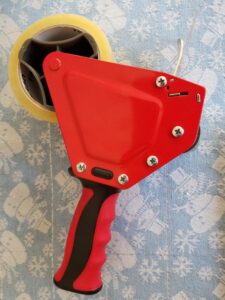 We recommend using packing tape to connect the batteries to recreate your unit’s battery pack from the loose components. Packing tape is generally strong and most importantly very thin. Thicker materials can hinder easy moving of the battery pack in and out of the battery compartment. |
Securing the battery pack components for useThe batteries need to be secured using packing tape or some form of adhesive backed material that will hold the batteries together as a single unit. Do not glue or otherwise permanently connect the components or you will not be able to easily change the batteries again. Remember that whatever tape is used needs to be thin enough to not interfere with placing the battery pack back into the APC Back-UPS Pro 1000 unit’s battery compartment. Also use caution to prevent the tape from covering the plastic protrusions on the battery connector pack. These tabs (protrusions) are necessary to guide the battery pack into the unit’s battery compartment to properly make the electrical connection. |
Completed battery pack showing the connection plug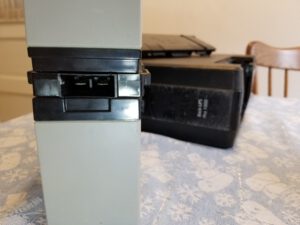 Be certain you have not blocked the connection plug (shown here in the center of the two batteries) with tape or other material. This end of the battery pack will ultimately be inserted first when reinstalling the pack into the battery compartment. It will only make a connection when inserted in one direction, as the plug connection is offset from the rails on the connection housing. |
Position the main unit to best access the battery compartment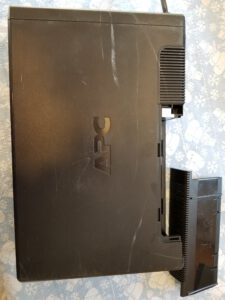 Now we are ready to reinstall our refurbished battery pack with the new batteries into the APC Back-UPS Pro 1000 unit. Remember to place the end of the battery pack with the electrical connection plug in first when reinstalling the pack into the battery compartment. Note that the guide rails on the top and bottom of the battery pack position the electrical plug so that it will only fit one way. |
Install the battery pack and button up and testOnce the battery pack is correctly installed in the APC Back-UPS Pro 1000 unit we can replace the battery compartment cover. Now you should plug the unit in to ensure your batteries are at (or reach) a full charge. And finally, run your APC software to ensure it passes a self test and you can set the date of the battery replacement. We’ve noted here that you may have to change and save a setting to “reset” the software in the computer running the APC software after changing the batteries. |