This post explains about setting up your Microsoft Hosted Exchange or Office 365 email account using the Outlook for iOS app available from the Apple Store or the built-in iOS mail app.
Setting up email with Outlook for iOS
- Open Outlook for iOS.
You’ll see an icon that looks similar to this one:

If you don’t have the app yet, you can download it from the App Store using this URL:
https://go.microsoft.com/fwlink/?LinkId=523809
Note: This app is available only for iOS devices using iOS 10.0 or higher.
- Open the collapsed menu in the upper left corner.
Note: First time using Outlook for iOS? Just tap Get Started.

Tap Settings > Add Account > Add Email Account.
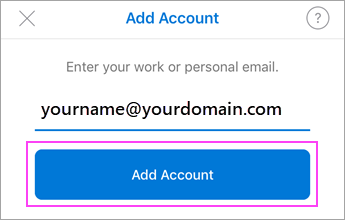
- Type your full email address, then tap Add Account.
Note: If you’re prompted for more information, you may have to manually setup or use IMAP or POP – see the additional information at the bottom for those details.
- Enter your email account password and tap Sign In.

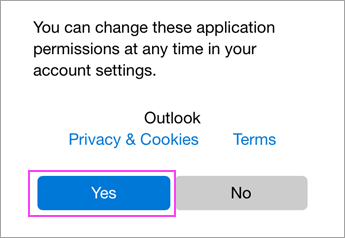
- Tap Yes or Allow to give Outlook permission to sync calendar, contacts, etc.
- Swipe through the intro and you should now be ready to use Outlook for iOS!
Setting up email with iOS Mail app
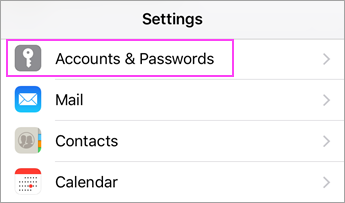
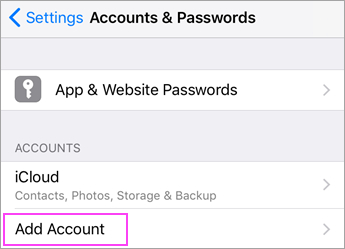
- Go to your device’s Settings, and scroll down and tap Mail > Accounts > Add Account.
- Select Exchange.
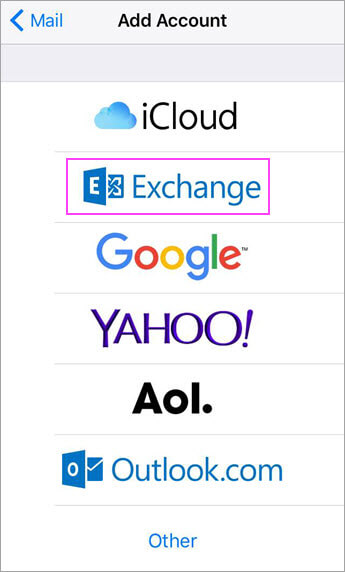
- Enter your Microsoft 365 email address, password, and a description of your account. Tap Next.
Note: Your email address should be your Microsoft Hosted Exchange or Office 365 email account (whether business or school account), such as you@youromain.com. The description can be whatever you like to identify the account, like “Work” or whatever.
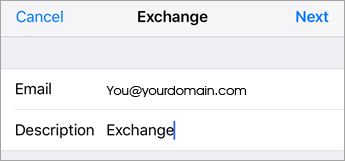
- If you’re prompted to enter server settings, enter the following and tap Next.
Email: your full email address.
Server: outlook.office365.com
Username: your full email address.
Password: your email account password.
- The Mail app may request certain permissions such as accessing your calendar and contacts. To agree, tap Yes.
Then choose the apps you want your email account to sync with your iOS device and tap Save.
- You should be all set to handle your email now!
IMAP settings for email on Microsoft Office 365 server
Disclaimer: CharlesWorks does not create operating systems, laptops, or smart phones. You may have to contact:
- the creator of your operating system (e.g., Microsoft for Windows or Apple for Mac and so on) to help set up your computer
- your smartphone provider for specific details on setting up your particular smart phone
- your IT person or staff who normally assist you with setting up email on various devices for you
That being said, these are some additional details on setting up IMAP for Microsoft Hosted Exchange or Office 365 email accounts on other mail clients or those requiring you to know more settings:
Here is the access information needed to securely access your email via webmail. We suggest bookmarking this address (unless you are using a shared computer):
https://outlook.office.com
Email Address – your email address
Password – your email password
If you want to add the account to outlook or a mail program, you’ll need to select New Account, Select IMAP Account, and then input your username and password.
Here is the access information to access your email via webmail or to set up an IMAP account to access your email using an email client (like Outlook or other mail apps).
When adding a new mail account to whatever mail app you use on your phone, make sure you select ‘IMAP ACCOUNT’ and then enter the following info:
username or email: your email address
password: your email password
Incoming server settings:
- outlook.office365.com
- port 993
- Encryption method: TLS applied/ticked
Outgoing server settings:
- smtp.office365.com
- port 587
- SMTP authentication applied/ticked
- Encryption method: STARTTLS applied/ticked


