Have you ever wondered how to tweak the spellcheck dictionary your system relies on? It’s a question that crossed my mind while navigating through Outlook web mail. Oddly, it seemed some words didn’t trigger the familiar spellcheck dictionary’s red underline, hinting they might be incorrect. Usually looking through my email is when I notice spelling errors in messages I’ve sent. Of course it’s way to late to correct them at that point!
Did I cause these errors?
 It dawned on me that these must be terms I unwittingly added (marked as okay) to my spellcheck dictionary over time. But where can I find and manage these words? Is there more than one location? I realized I needed to delve into the depths of my system’s and browser’s settings to review and possibly revise these spellcheck dictionary lists. Let’s explore the avenues for editing this linguistic arsenal.
Locating the Misspellings
I like using web mail in a browser. I do many search results when using email. Webmail gives me faster search results than using an email client. To edit the spellcheck dictionary used in my system, including the one used by Outlook web mail for spell checking, I had to access the language settings in my browser as well as my operating system. Here’s how I did it on my Windows 10 workstation and Chrome browser. Hopefully yours will work similarly:
Chrome Browser Settings
I’ve written this from the aspect of a Google Chrome browser user. It may be similar for your browser and I hope you find this helpful.
- Open your web browser (I was using Google Chrome to do this).
- Navigate to the Settings (or possibly preferences on other browsers) menu. This is usually represented by three vertical dots (or lines on some other browsers) in the top-right corner of the browser window.
- Look for Settings (or possibly preferences on other browsers) and click on it.
- In the Settings menu, find the section titled Languages (or possibly spell checking in other browsers).
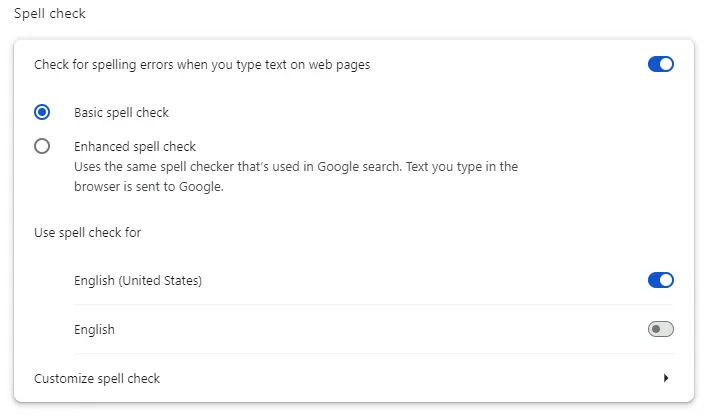
- On the Languages page in Chrome, I noticed an information/settings box titled Spell check like below.

- Mouse over the Customize spell check near the bottom of that box. Click on it to be taken to a Manage spell check page.
- Now you will be at the Manage spell check page. I found this rather clunky. Unfortunately, this interface doesn’t let us edit any existing words. All you can do here is Add a new word to your Custom words list or delete existing ones using the X on the right of them.
- The changes seem immediate so you can simply exit out of that browser tab when done.
Windows 10 Operating System Settings
Next I wanted to edit the system-wide spellcheck dictionary file.
- I navigated to the following folder (replaced <username> with my actual <username>):
C:\Users\<username>\AppData\Roaming\Microsoft\Spelling
This folder will contain subfolders for each language you have installed on Windows. Locate the folder corresponding to your language (e.g., I used the en-US folder for English in United States).
- Inside the language folder, I found four files, named:
default NotUtf16(1).dic
default.acl
default.dic
default.exc
- Right-click on default.dic and choose “Open with Notepad” (or another text editor) to view and edit the list of words. Important: be cautious while editing this file. Make sure not to delete the first line starting with “#LID” and save your changes only after you’re sure.
- Each word should be on a separate line.
- You can add new words by inserting them on a new line and remove unwanted words by deleting them.
The default.dic file appears to hold all the custom words I’ve added. However, there were much shorter word lists in each of the other files as well. I was able to use my favorite text editor with all the files.
Summary
I was astounded by the number of misspelled words in my spellcheck dictionary files. Someplace or another over time I must have clicked adding them to the spell check. My lists have been active on my workstation since Windows 7 and I upgraded to Windows 10.
Hopefully this will help you to weed out those errors as well!
More information about Google’s Chrome browser and Mozilla’s Firefox browser:
-
Google’s Support Page: A good starting point is Google’s official Chrome help page https://www.youtube.com/watch?v=3tvGp_X-2Ek. This page covers the basics of using Chrome, like browsing the web, managing tabs, and downloading files.
- The best place to find extensive information on using Mozilla’s Firefox browser is Mozilla’s own support website: https://support.mozilla.org/en-US/products/firefox/get-started which offers a variety of resources.


