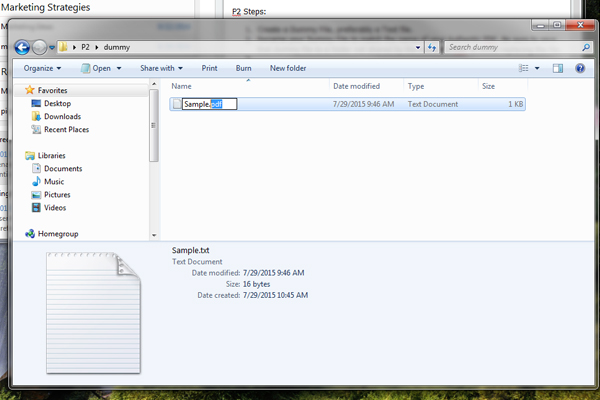
1. Create a Dummy File in your computer, preferably just a Text file. This file must not be in the same directory or folder that the large file you want to upload is in.

2. Rename your Dummy File to match the name of your Authentic File (the actual file you need to get up to the system). Again, be certain to save that Dummy File to a folder not shared by the Authentic File to avoid replacing the actual file you need to get to your WordPress site.
3. Now log in to your WordPress site. If you do not know the web address of the login page, then enter the name of your site, then add to the back end of the address, “/wp-admin” and hit Enter. Once the log in page finishes loading type in your Username and Password into the applicable areas and press the blue Log In button.

4. Following your log in you should find yourself on your website’s Dashboard page, with the navigation on the left consisting of the various functions available. Third one down the list, just below Posts, is Media section. Click on Media then click on Add New.

5. Drag and drop the Dummy file into the dotted square and it will upload.
6. Now, using your favorite FTP program (or a plugin that allows file management), you need to upload the oversized file to your website’s uploads directory in place of the dummy file. If your website is already setup in FileZilla or some other FTP program with which you are familiar, go ahead and skip a head to step 8.
The directions here are shown for an open source FTP program called FileZilla freely available for various platforms from the https://filezilla-project.org website by clicking on the Download FileZilla Client and installing it on your computer or device.
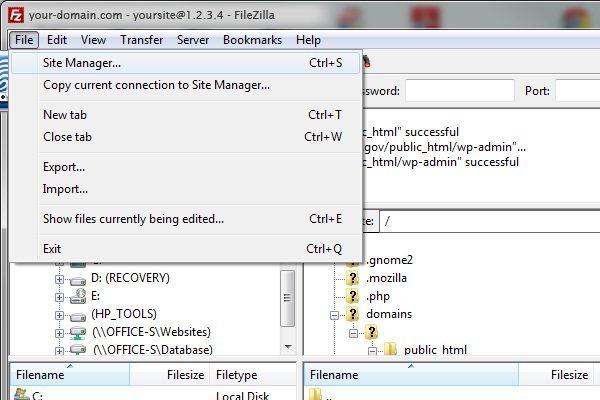
Run FileZilla. Click on File and then on to Site Manager if you do not already have your website setup for FTP.
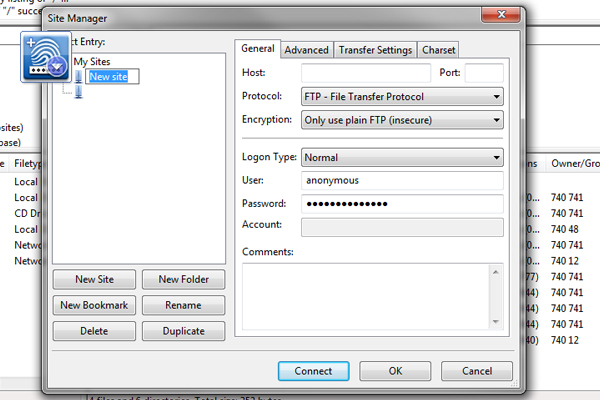
7. With the Site Manager active, enter in the name of your website followed by the Host, your User name and Password into the applicable areas. Make sure the Encryption is set to Only use plain FTP and the Logon Type is set to Normal. Then Click Connect.
8. Open the public_html folder and then proceed into the wp-content folder where there will be an uploads folder. After clicking uploads then proceed to the folder labeled with the current year (e.g. 2015) then open the folder labeled with the current month (e.g. 07)
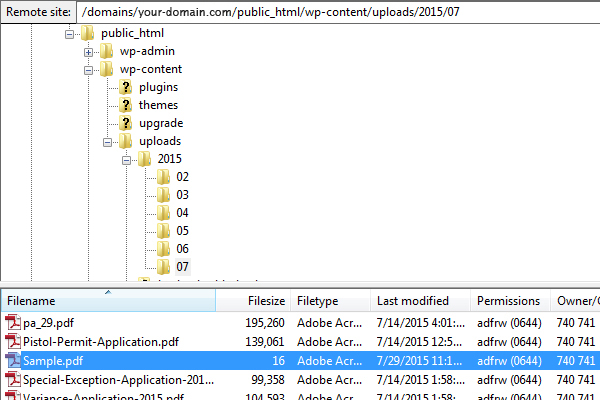
9. Search for your Dummy File to confirm that it is indeed there, then drag and drop your Authentic File into the folder.
If the drag and drop doesn’t work, you may have to navigate the local folder (which is normally displayed in a left window in FileZilla) to where your authentic file is located on your computer or device, and then select it by right clicking on it and selecting upload to place a copy on the server.
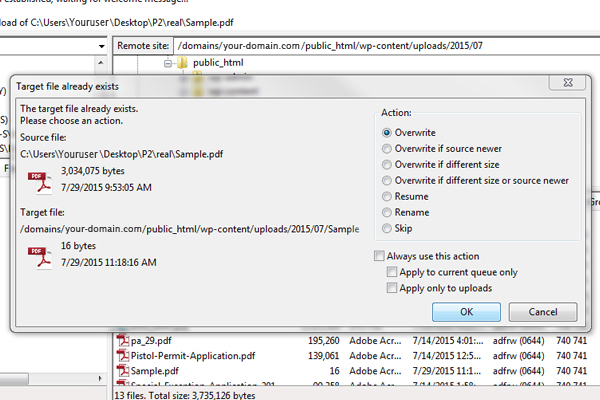
A window will open labeled as, Target file already exists (make sure the Overwrite box is checked) and then click OK. Once the upload is complete, the larger file you wish to use will be available in the Dummy File’s place in the Media section of your website.
Now you can exit from FileZilla. Inserting your file on the desired page in your website will now allow use of the large file you needed there.
For more information about WordPress websites contact Charlesworks at (603) 924-9867 or by emailing us at Websites@CharlesWorks.com.


