Adding audio files to a page is very similar to adding images. Even though the media uploader recognizes what you upload as legitimate files and displays appropriate file-type icons next to them, WordPress might not have a media player that can play some files. You can use a third party platform like Compact WP Audio Player. These instructions will show you specifically how to add MP3 audio files in your WordPress website using the Compact WP Audio Player Plugin (an approved, safe plugin available through WordPress.org), and will assume that you already have that plugin installed and activated.
You might be able to follow these directions to add just about any audio file to WordPress that will play using WordPress. As with any WordPress additions, CharlesWorks recommends you ensure your pages work using various browsers (Explorer, Firefox, Chrome, Safari, Edge to name a few) so site visitors do not have difficulty accessing your material.
The time it takes to add the file depends on several factors, such as whether the file will actually work in WordPress, whether it uploaded correctly, the size of the file, and so on. Larger files typically take more time to upload.
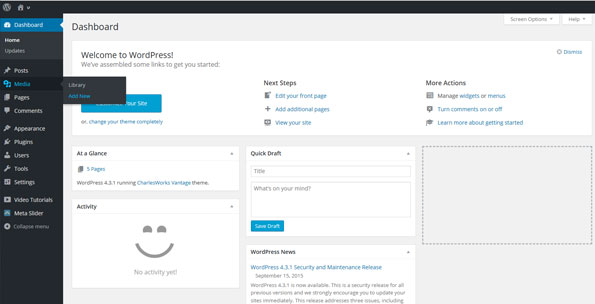
Step 1: Import the Audio File into your Media Library in the dashboard by clicking on “Media” and then on “Add files”:
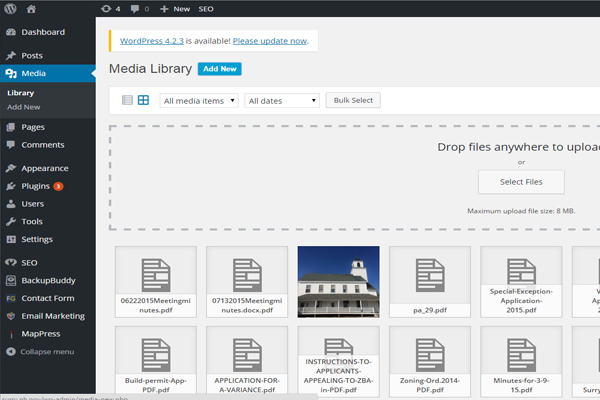
Step 2: While you can usually drag a file into the “Drop files anywhere…” area shown below, sometimes that won’t work and you must hit the “Select Files” button. In that case you need to browse to find the Audio File you want to upload on your computer or device and select it with your mouse in order to import it into your Media Library:
Step 3: Once the file has been successfully uploaded to your site, it is always prudent to check the file to ensure that it is in the proper format so it will work from your website. This will save a lot of frustration if:
a. the upload was corrupted, or if
b. the file is damaged, or if
c. the file is incorrectly formatted.
For example, all files with the mp3 file extension might not be encoded identically. In that situation you’d have to try to find another version of the file that is in the correct format and attempt this process again. Here’s one way to tell if the file is usable by WordPress using WordPress itself.
In the Media Library, find the uploaded audio file and click on it showing a page like this displaying the “Attachment Details”:
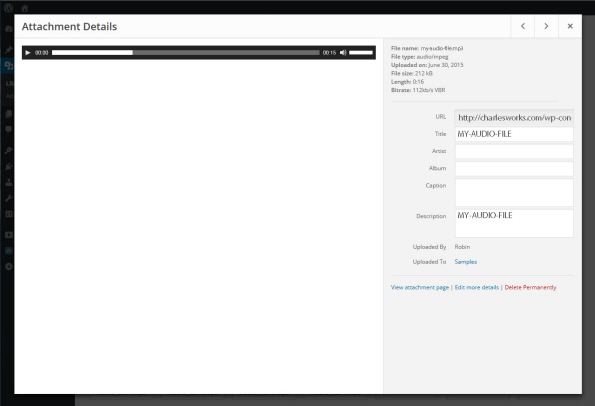
Now click on the “Edit more details” link in the lower right quadrant of the above screen for something like this screen:
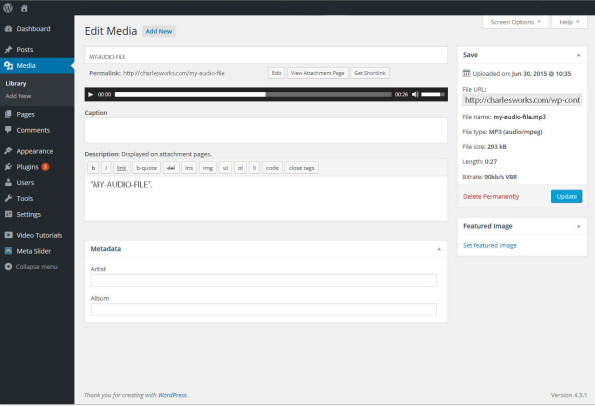
Note that in the example, directly under the “Permalink: “ is a player button. Clicking this should play your audio file. If it does not, then the file might have uploaded correctly or not be encoded properly or may have been created incorrectly. Also, ensure that if, for example, the file is an mp3 file, that the file type indicates audio/mpeg or it might not work. If your file does not work here, it more than likely won’t work in a web page.
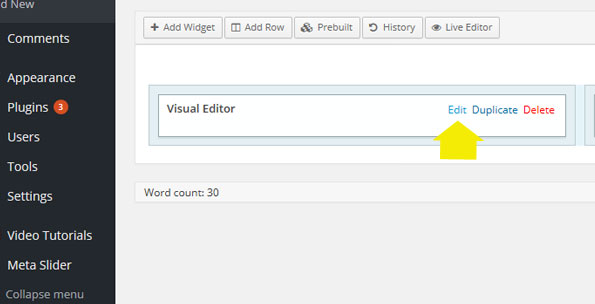
Step 4: Open the page that you wish to have your Audio File on, and place your cursor where you would like to have your media file appear. When you open your page, if your page is using “Visual Editor”, click on “Edit”, within the visual editor box (you will have to hover over the box with your mouse to see the menu appear):
Step 5: Select the “Add Media” button, which will take you to your Media Library, where you can select the mp3 audio file to import.
Step 6: Click on the media file and select the blue button “Insert into page”.
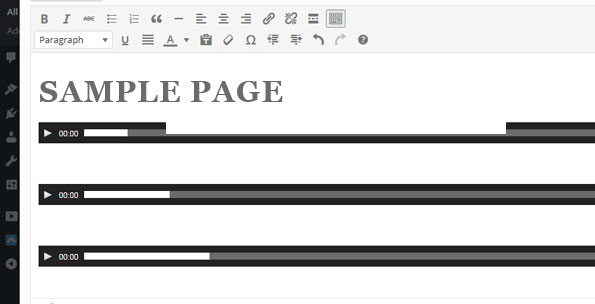
Step 7: You will see the media file on the page once it has loaded. Your page will look something like this:
Step 8: Before exiting this page, be sure to select the blue button “Done”.
Step 9: Click the blue “Update” button on the right hand side of the Edit Page screen and you should be done.
For more information about WordPress websites contact Charlesworks at (603) 924-9867 or by emailing us at Websites@CharlesWorks.com.