These instructions were generated using Thunderbird 1.0. Your Thunderbird may look slightly different depending on what version you have. To download Thunderbird, visit http://www.mozilla.com/.
If you do not want to go through the wizard setup, see the section below for Account Settings.
Using the Wizard
If you are running Thunderbird for the first time, and have not imported any settings from another email client, you will be presented with the following New Account Setup window. Make sure that you have Email account selected, then press the Next button:

The next window will be the Identity window. Please fill in your name and email address, then click the Next button when you are done.

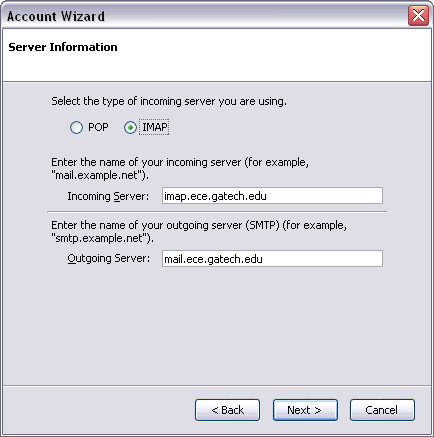
The next window is the Server Information. Fill in the following information:
- Select POP (preferred) or IMAP for the “type of incoming server you are using”
- For Incoming Server: mail.yourdomain.com
- For Outgoing Server: mail.yourdomain.com
When you are done, click the Next button.

On the User Names screen, you will fill in your username (your entire email address). This will be the same for both the Incoming User Name and Outgoing User Name. Click the Next button when you are done:

The next screen is for the Account Name. You can fill in whatever you want, or keep the default (which is what you previously filled in for your email address. Click the Next button when you are done:

Finally, you will see the Congratulations! window showing you what you have filled out. Please check through it to make sure you have the correct settings. Click the Finish button when you are done:

When the wizard closes, you may see a message window pop up asking if you want Thunderbird set as the default mail application:
- If you do not want to perform this check again, then make sure you have a check next to “Do not display this dialog again”.
- If you want to set it as your default, then click the Yes button.
- If you do not want it to be your default, then click the No button.

Follow on to the Account Settings section below
Account Settings
When Thunderbird starts up, it will probably try connecting to the mail server immediately. Click on the Stop button near the top right corner of the window to stop the connection. There are a few things that you will need to make sure are configured before you will be able to connect to the mail server:

Go to the Tools menu, and select Account Settings… On the left side, select Server Settings and make sure that you have the following filled out:
- Server Name: mail.yourdomainname.com
- Port: 993
- User Name: fill in your username (entire email address) if it is not already there
- Make sure you have a check next to Use secure connection (SSL)
- For the rest of the settings on this screen, fill in what you want

Now, select Outgoing Server (SMTP) on the left side and make sure that you have the following filled out:
- Server Name: mail.yourdomainname.com
- Port: 25, or 40
(Note: If you are having problems sending email, try changing the port to 40. Many ISPs are now blocking the default port 25.) - Check next to Use name and password
- User Name: fill in your username (the same email address that you filled in for the POP or IMAP settings)
- Use secure connection: select TLS
Click OK when you are done.

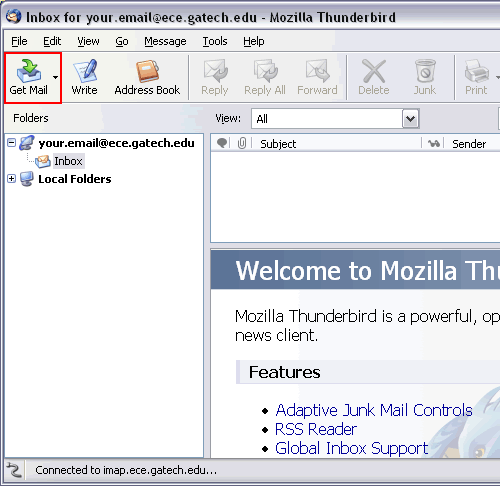
Now, you are back at the main Thunderbird window. Click on the Get Mail button which is in the top left corner to connect to the mail server:

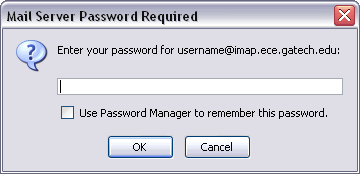
A window will pop up asking for your password. Enter your password and click OK:

You are now ready to read your email!


