Step One
In your favorite web browser, navigate to https://portal.office.com to log into your Microsoft Hosted Exchange admin account.
Step Two
Navigate to the Admin area by clicking on the Admin area icon across the top of the page, or by clicking on the grid in the upper left and selecting it there:

Step Three
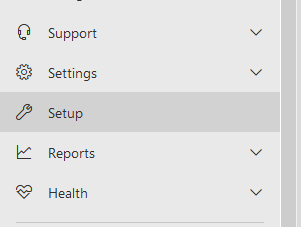
Click on Setup in the left hand menu, with the wrench icon beside it:

Step Four
Scroll down to Data Migration and select Migrate your users’ data by clicking on the View button. On the Migrate your users’ data page click on the View migrations button:

Step Five
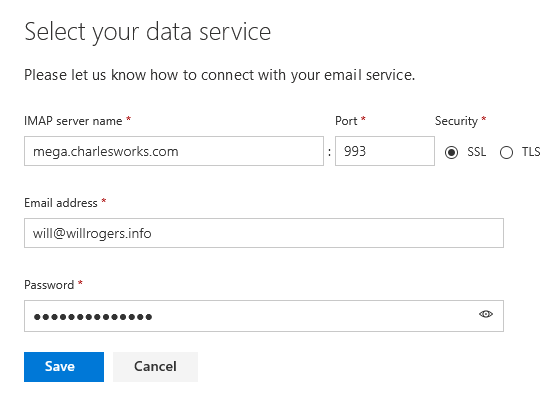
Enter the server access info. In our example for the IMAP server name * we used the server name mega.charlesworks.com and for the Port * we used the standard encrypted IMAP port of 993 and for Security * we chose SSL for the encryption method. We also need to fill in the Email address * (which is often referred to as the user name) as well as that email account’s Password *. Once these are filled in, click on the Save button:

Step Six
Next you’ll see all the Exchange accounts you currently have set up, as well as if they have licenses assigned to them.
Next to each account you’ll see the Source Email, this is the account on Mega you’ll be pulling from. Fill in the appropriate email and password info and then wait for the system to connect. If It gives you an error, and all your settings are correct, refresh the page and try again. When it connects, click the start migration button to start moving emails to the new mail accounts. Depending on the amount of data in them, we suggest not migrating more than two accounts at a time to avoid server load.

The system will notify you on this page when the migration is complete. You can let it run in the background, you don’t need to leave the page up, but it’ll be handy for checking it’s status in case there are errors.
Note that we have seen accounts with in excess of 20 gigabytes of email take several days to fully migrate, so be patient.


