I intend to focus this article on yet another way of speeding up your website’s page loading time. My focus here will be hooking up Redis to speed page loading in complex websites. Over the years I’ve noticed that website pages have become more complex to meet the demands of information and aesthetics.
If you’re in a hurry and already have Redis working under admin on the server, to just add it, I suggest you just head down to Steps Two through Step Five below.
WordPress running on Debian
WordPress has been my favorite platform to develop websites since about 2010. My involvement in web development is mostly with the servers. WordPress seems to run best in a Linux environment. Debian has become my favorite Linux based operating system for a variety of reasons:
-
- You can install it on a 32bit or 64bit machine
- Debian is free to download and install
- It is one of the most secure operating systems
- You can upgrade Debian to its next version
Debian has been around since about 1993, making it one of the oldest Linux based operating systems. WordPress and Debian are kept up to date with regular updates. This helps keep them both secure.
The Cost of Security vs Page Speed
 I’ve noticed that all this security in WordPress and Debian comes at a cost. Coding was extremely compact and functionality centered before security concerns. I’ve watched operating systems (including Debian) get more and more complex to keep them secure. I have seem WordPress become more complex to keep it secure as well. Modern operating systems require those administrating them to continue to learn more and more about how to keep them secure. One of the beauties of WordPress is that despite all its security enhancements, you, the end user should still find it easy to learn and use.
So back to the cost of all this security. More complex websites are taking longer to resolve. Hosting providers, like us at CharlesWorks, are always seeking ways to speed up page rendering. Page rendering simply refers to getting the website’s material from the server’s hard drive to the site visitor’s browser.
Using Redis to Speed Page Rendering
 I wrote this for those of you running a complex website that has many pages. You may have noticed your pages taking longer to render. Note that if you have a relatively simple website – that seems to serve its pages just fine – then you might not noticeably benefit from this. Quickening the page rendering speed is where Redis comes in. Redis is a separate server that operates on the website server where your site resides. Redis will speed up your page rendering. That will reduce your loading time. It also reduces the load on the server by reducing disk accesses for database lookups. It’s great in every aspect.
Content Management Systems like WordPress store the site’s materials in the database. Sites with more pages and more material stored in their databases slow down. This is because the web server must make numerous reads and writes from hard drives to get and save database materials. Redis, in a nutshell, is able to move pieces of the database into the server’s memory and serve it directly from there. Coupled with caching, Redis can significantly speed up the serving of a website page.
If you are installing on a DirectAdmin system skip this UPDATE below and proceed to the Step One in red below.
UPDATE 7/12/2024:
In addition to DirectAdmin servers, CharlesWorks also runs Virtualmin servers. The process for using Redis with Virtualmin is simpler than that of DirectAdmin. To install the Redis server on a Virtualmin box running under Debian 12, you can simply install it on the server with these commands:
apt install redis-server
Then connect it to PHP with this command (I am using PHP 8.2 in this example):
apt install php8.2-redis
Now go directly to Step Four part 2 (since you do not have to make any changes to your wp-config.php file like in DirectAdmin systems) and you’ll be all set.
Step One:
Turning on Redis for the DirectAdmin Reseller
Once this step is done, you can always skip to the next step. This step had eluded me for a while. On new DirectAdmin installations, this step is already done. However, on boxes that have been running a while, Redis needs to be enabled for whatever resellers will be authorized to use it.
Before Redis can be used on the web server running DirectAdmin at all, Redis needs to be enabled for the particular reseller. This is true even if only one reseller called “admin” exists on the server. It is actually quite simple:
-
- Log into the administrative control panel.
- Navigate to Account Manager > Show All Users.
- Click on the “admin” user.
- Click on the admin user’s Modify tab.
- Scroll down and check the Redis checkbox.
- Click on the Save button underneath the choices.
That’s it. Redis is now enabled for the admin reseller and can be added to other sites on the server as indicated in the steps below.
Step Two:
Turning on Redis on Your Web Server (DirectAdmin Reseller/Admin)
Now let’s speed up each page in your website with the help of Redis. If you have access to your server you will have to ensure Redis is installed and operational on it. We can install it for you if your website is hosted on a CharlesWorks web server for a nominal charge. If you are not a CharlesWorks web hosting client, you should contact your hosting company and have them install it on your website’s server.
At CharlesWorks part of our installation process is to enable Redis for your website’s control panel. We go into our administrative website control panel and activate it as part of the Redis setup.
In the server administrator’s DirectAdmin panel, the ability to access Redis by a particular website needs to be enabled. This is accomplished by by going to the website’s controls and in the Modify tab activate it as shown here:
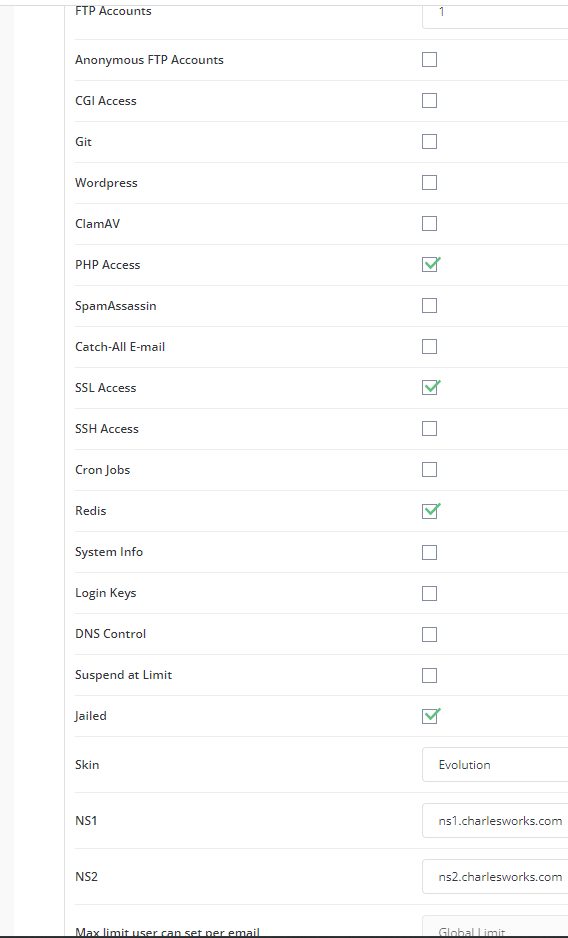
Remember to Save the settings at the bottom of the page.
Step Three:
Turning on Redis in your DirectAdmin User Website Control Panel
You must activate Redis as indicated in the last step to be able to turn it on in your website’s DirectAdmin User control panel. Once you have done that, Redis will be able to be connected to from the website. In the website’s DirectAdmin control panel, navigate to Advanced Features:
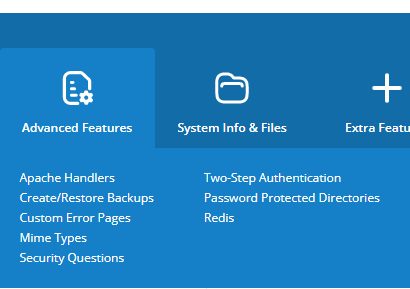
Now click on Redis and you should see the Redis panel:
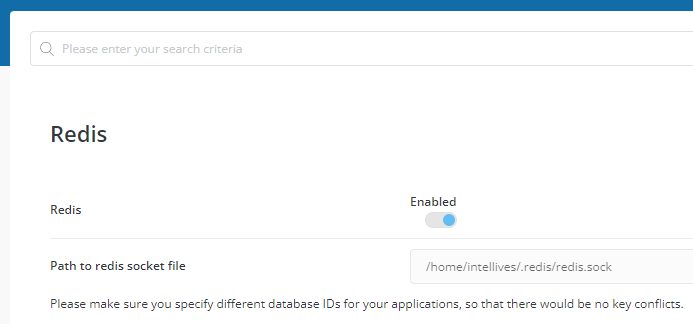
Once you click on the Enabled switch to enable it, the Path to redis socket file will be displayed. You will need this path information for the modification to your wp-config.php file that you will make in step 1 below.
Step Four:
Turning on Redis in your WordPress Website
Redis now needs to be accessible from your WordPress website. There are two steps to allowing to your WordPress site to access Redis:
-
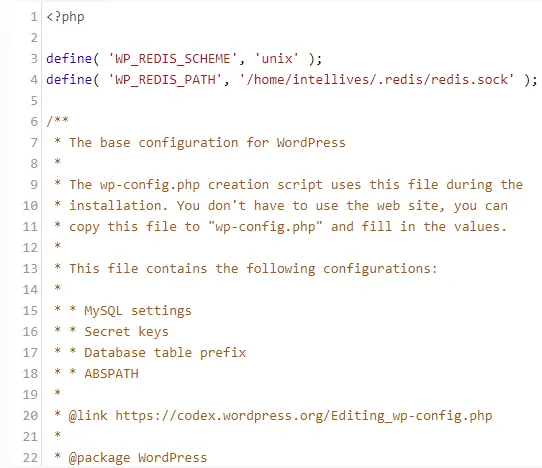
- Modify your wp-config.php file. You need to edit your WordPress site’s configuration file. It needs to have two lines of code added to it. You can accomplish this using the DirectAdmin control panel’s File Manager. Or if you have access to the server directly you can edit the file using nano or vim. You should the two lines of code similar to below. You will have to substitute your site’s Linux username for “username” in the second line for it to work. Place these lines at the beginning of new lines added right after the first blank line after the <?php line:
define( 'WP_REDIS_SCHEME', 'unix' );
define( 'WP_REDIS_PATH', '/home/username/.redis/redis.sock' );
When done, the top of your wp-config.php should look something like the following graphic. There might be other lines in there based on additional plugins. Don’t worry if you don’t see line numbers – these in my picture were added by DirectAdmin’s File Manager’s text editor:
- Add the Redis Object Cache plugin to your site. Now you need the install and activate the Redis Object Cache plugin by Till Kruss. The Redis Object Cache plugin is defined by its creator as “a persistent object cache backend powered by Redis.” This essentially allows your website to communicate with the Redis server on your website’s server.
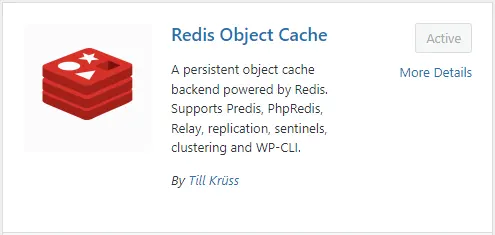
- Modify your wp-config.php file. You need to edit your WordPress site’s configuration file. It needs to have two lines of code added to it. You can accomplish this using the DirectAdmin control panel’s File Manager. Or if you have access to the server directly you can edit the file using nano or vim. You should the two lines of code similar to below. You will have to substitute your site’s Linux username for “username” in the second line for it to work. Place these lines at the beginning of new lines added right after the first blank line after the <?php line:
Step Five:
Adding Caching to Speed Page Rendering With Redis
The next thing I needed was a caching plugin that worked well in tandem with Redis to reach good page speed. I experimented quite a bit with our CharlesWorks site to find what I thought was the best combination. The caching plugin I believe worked the best with the Redis plugin is WP Super Cache by Automattic. It makes sense that it would integrate well with WordPress since Automattic essentially is WordPress.
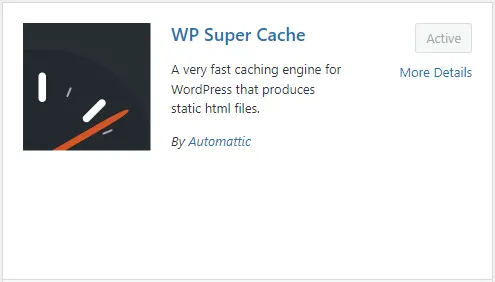
The WP Super Cache is simple to use and as easy to install as any plugin. The only drawback is it nags you to install Jet-Pack which wants you to create a WordPress account that you most likely do not need. We just ignore the nag, since your site is better off having as few plugins as possible.


