To begin, you must first have the incoming and outgoing server information from your Web-Based Email account. This information will be used in steps 7 and 8. Usually, this information consists of the following:
1. Email server (incoming and outgoing) is usually mail.yourdomain.com (replacing the yourdomain.com with whatever your actual domain name is, of course).
2. Your username (which is usually your entire email address in lower case).
3. Your password (remember that passwords are case sensitive and should consist of upper and lower case characters and numbers and special characters like – or ^ or ! and so on).
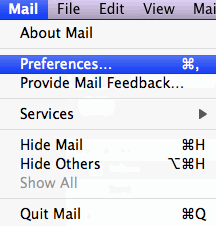
4. From the mail menu, select Preferences

5. Click the ![]() icon in the bottom left corner to create a new account
icon in the bottom left corner to create a new account
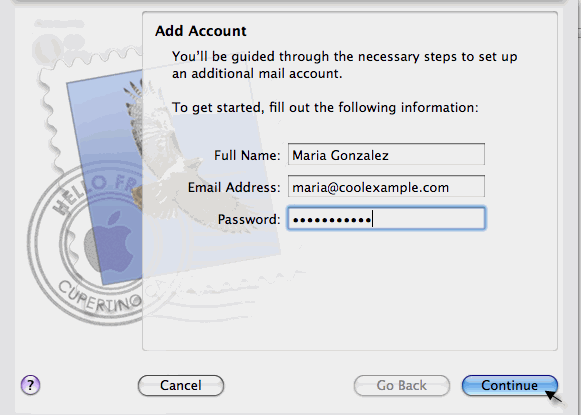
6. Fill in the required information:
Full Name = The name to display on your email (human friendly)
Email Address = Your email address (can be human friendly here)
Password = Your email account password (case sensitive)

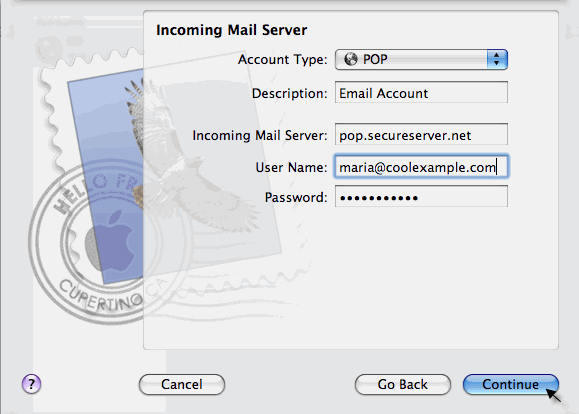
7. Click Continue and again fill out the required information:
Account Type = Select POP or IMAP
(Your email account must support IMAP functionality in order to use IMAP)
Description = A description of the email address to display in the email account list in Mail
Incoming Mail Server = The incoming server name listed in Web-Based Email (from steps 1-3)
User Name = Your full email address in lower case
Password = Your email account password

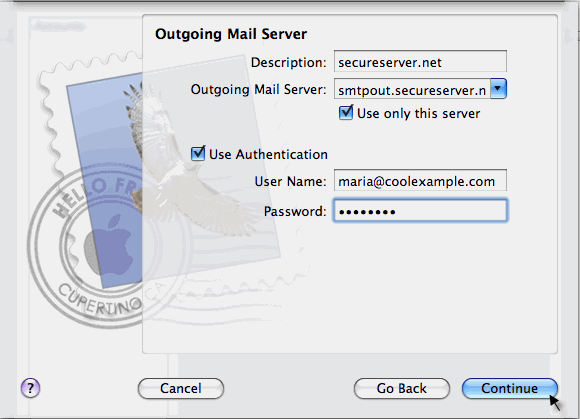
8. Click Continue and fill out the required information:
Description (a description of the server to display in the SMTP server list in Mail)
Outgoing Mail Server (the outgoing server name listed in step 1 above)
Select Use Authentication
User Name (your full email address in lower case)
Password (your case sensitive email account password)

9. Click Continue
10. Click Create


